This is a bonus tutorial and the only users notified of the release of this tutorial where Twitter followers and RSS subscribers. If you are not a Twitter follower or an RSS subscriber, please take a minute and either Left click the Twitter/RSS Logo located on every web page on the top left hand side of the page.
Summary:
Nope were not talking about spotting fake diamonds or watches or purses, but we are talking about spotting a modified image. Let’s us make it very clear that we are NOT expert Photoshop users and we are not trying to tell you every possible way to find problems with modified pictures. We have worked over 7 years rating and judging Photoshop contests and we see common problems in beginner’s entries. Also, the images below might not be the best examples, but at this stage we just want you to get a feel for problems to look out for.
This section was created to give you strictly common problems with images and the reasons why an image looks wrong (sometimes you can spot the fake portion, but you do not know exactly why it looks wrong). Once you learn how to identify these problems, it will actually help you with your own photos. This is a non-technical look at how to spot issues within photos.
The examples below are over the top and are meant to stand out (some of them have multiple problems). In a real life example you will need to look closer to find the errors.
Overview:
Start by turning on the “Navigator” palette. This will help you zoom and pan in the picture. Have your image zoomed into the full screen. The goal at this stage is not to determine why it looks wrong, but that something is wrong in a specific area. When something does not look right, make a note of it on a piece of paper. Now zoom into it a bit and repeat the process (use the Navigator to pan around the image). Now you should have a list of possible problem areas.
Before proceeding to the next section, please zoom out to a full screen view. Most of the problems will fall into a few basic categories.
Shadows – Overview:
Almost everything has a shadow. Even indoors you will get a shadow if there is light in the room. When you look at a shadow, you will notice a few areas which are important to go over. 1). Shadows are usually darker closer to the object that is blocking the light. This means, farther away from the object, a shadow will be lighter in a shade. 2). Usually the outer edges of a shadow it becomes a bit blurred. 3). Based on the strength of the light and the size of the blocking object, the shadow length and angle will change.
So if you are adding an object to another image, how do you determine the shadow strength, direction, and angle? The 2 common ways are: 1). Look at the image that you adding to. Do you see shadows? If so, that will tell you the strength, direction, and angle. 2). So there is no obvious shadows to cheat off of so you are left with looking at the angle, strength, direction of the light source. Now you know the direction of the light source, you will be able to create your shadows. Example: If you are indoors and have a light source right above you and you put your hand (flat) a few inches over a table, you will see a shadow. Now raise and lower your hand. You will notice 3 important areas. 1). The shadow should be almost right below your hand. 2). When you raise your hand, the shadow becomes lighter and when you put it closer to the table it becomes darker. 3). As you raise your hand, you will notice that the edges of the shadow become more blurred. Now you have a basic overview of shadows, let’s proceed to the next section.
Shadows – Wrong Direction:
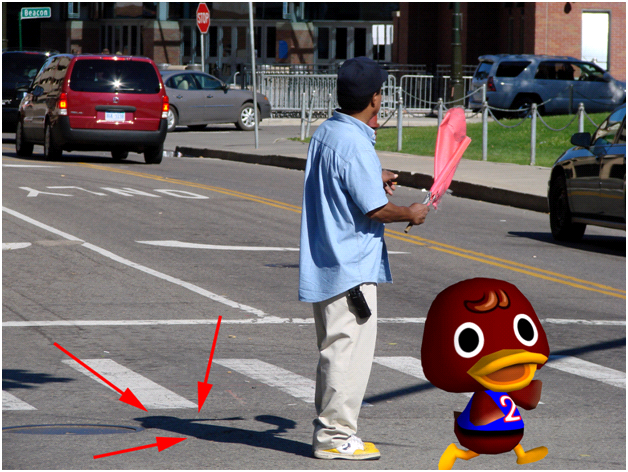
A common mistake is creating shadows in the wrong direction. If you followed the information above, you will have no problems creating shadows in the right direction.
Shadows – No Shadows:
One the most common problems we see with Photoshop contests are that the user did not add any shadows to the pasted object.

Floating Objects:
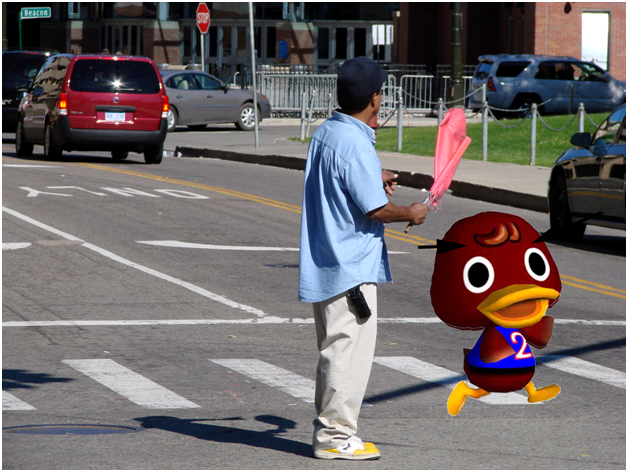
Have you ever pasted on object into an image and it appears the object is floating above the ground? This is usually caused by 2 problems. 1). The perspective (angle) is incorrect. Use the Perspective, Skew, Distort and other transform tools to align the object with the background to solve angle problems. 2). Shadows! Yep a shadow can cause this problem. The easy solution is to create a small shadow underneath the object.

Flipping Objects:
This is a less common problem, but we still see it happening from time to time. Let’s say we had an image of 2 people (man on the left side and a woman on the right side). For some reason you need to flip the image (you want the woman to be on the left side and the man to be on the right side). You use the Marquee selection tool and you make a selection and flip the image. What you do not realize is behind the 2 people in the background is a sign with words on it. When you flip the image, it will flip the words. This is hard to catch because it is in the background, but now that you know it could happen, try to pay attention to all areas when you flip the image.

Reflections:
When you are working with water, mirrors, or any other reflective areas, it is important to add reflections. This area is commonly missed by Photoshop users! When you are looking at the original image, look for reflections! Make a note of the reflection angle and the strength of a reflection. One of the top reasons why an image looks out of place in the water is because there is no reflection of the object in the water.

Masking or Cutout Problems:
We have talked about masking and cutouts in previous tutorials, but if you do a bad job in these areas, it will stand out like a sore thumb when you try to merge your photos. For contests, you do not have to be perfect, but it sure needs to fool a person when they are viewing it at 800X800 in size. Photoshop Tip - To see your flaws of your cutout, paste it into a new image that has a white or black background.

Quality of Both Images:
This problem is easy to detect. Let’s say you have 2 images and 1 image is definitely a high resolution image and the 2nd image is a low resolution image. Don’t try to put these 2 images together! Look at the artifacts (dots in the image), especially in the head area. Even though it is the same, the other area we have seen people try is take 2 high resolution photos, but 1 of the photos is not big enough, so they scale that image up. When you scale up an image, the resolution is degraded very quickly. Then they try to merge the 2 photos and it looks awful.

Light Problems:
We talked about shadows, but you also want to look at light sources and how they are displayed on an object. Example: The original picture has a person standing outside. You can tell the light source is strong on the right hand side and back of the person. Now you add a second person and you forget to add the light source or you add to much light source.

Color Matching:
This is commonly found when you are trying to do a head replacement. You will notice the skin tones do not look correct. The other problem with the head replacement which we have already discussed is the perspective or angle of the head. It is easier to get a new source picture with the correct angle then it is to try to force it by skewing, distorting, etc. the head of the person. On this example the angle is pretty good, but the skin tone does not match the neck area.
Sizing:
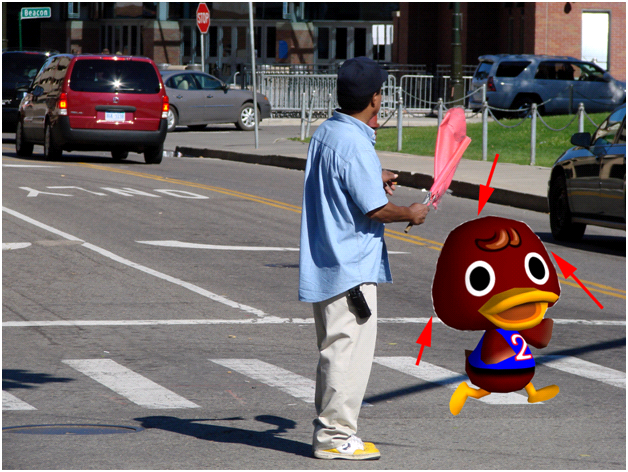
If you are going to paste an object into an image, make sure that the size matches the rest of the photo! Also, objects that are farther away from the camera will appear to be smaller. Example: Take 2 people that are about the same height. Have one person stand 5 feet away from the camera. Now have the next person stand about 30-50 feet back of the other person and position them a little to the right or left of the 1st person. Notice how the person in the background looks smaller? When you are pasting an object into a photo, look at the objects that you are placing it next to. Use these objects as a comparison on how big the pasted object should be.

Layer Positioning Problems:
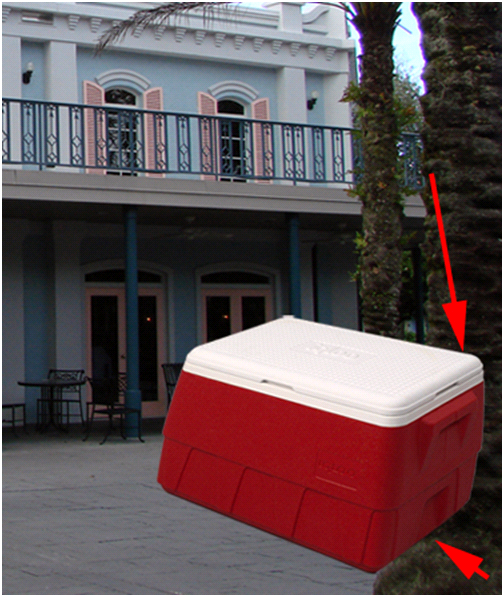
When working with a large amount of layers, you will find this problem commonly occurs. Let’s give you an example: You add an object to a background of the actual photo and let’s say to the right hand side of the picture. You have this pasted object as the top layer in your layers palette. Now in the original image, you have a tree towards the front of the actual picture and also on the right hand side. Because the pasted object is on the top layer, it will give the effect as ½ of the object is in the background and the other ½ is in the front of the picture. To solve this problem just mask out the portion of the pasted object that would normally be blocked by the tree.

Patterns and Seams:
Oh the dreaded pattern and seams problem. Let’s talk about patterns first. Patterns are usually caused when you are cloning (copying small portions) specific areas. Example: You have a beach towel on some sand and you want to clone the sand to hide the beach towel. Sometimes sand is a different shade of color in different areas. If you clone the sand either too close to the towel or the sand is a different shade, your eyes will detect that there is something wrong with the picture (your eyes see a pattern). So for this example, pick a different area of sand to clone that the color matches and is not close to the towel. The next area is seams. Seams are usually caused when you are cutting out an area and it does not blend well when you paste the object. Example: Take the image of the sky which we have supplied you in so many tutorials. Use the Marquee selection tool and copy a square portion of the blue sky. Now paste it to another location in the image. You should see a seam. One easy way to blend the edges better is by using Patch tool or the Healing Brush.

Conclusion/Coming Soon:
As you can see there are many ways to determine if the image is a fake. These are ONLY the basics of identifying problems with an image. Coming soon to the Photoshop Challenge section will be “Fake Challenges”. Your goal in these Fake Challenges is determine not only what is wrong with the picture, but why it is wrong!
Remember, if you can identify a modified picture, than you will know what to look for when you are working on your own images. Once you identified the problem, check out our beginner tutorials to determine how you can fix your issue.

Click Picture To Download PDF Tutorial
Download Adobe Reader, Adobe Corporation


Nice tutorial. Thanks for taking the time to post and make it available. Great site. :)
ReplyDeletePDF link above, get:
ReplyDelete'Invalid or Deleted File.
The key you provided for file download was invalid. This is usually caused because the file is no longer stored on MediaFire. This occurs when the file is removed by the originating user or MediaFire.'
This looks a nice site. However, would have appreciated seeing a pic of that shadows example with everything fixed up, by way of comparison/to give me more certainty of what's considered acceptable !
I like this information Thanks for sharing this. I would like to these articles and I have confusion but I read your news and I easy understood
ReplyDeleteSpotting fake diamonds