**Reminder, Photoshop Challenges are only promoted through either Twitter or RSS updates.
Overview:
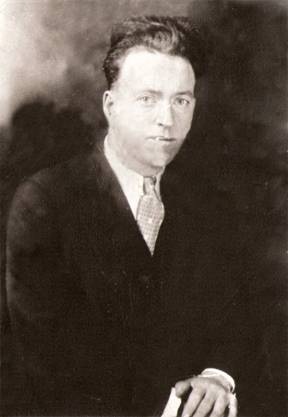
In this Photoshop challenge we will be supplying you an old image that is cracked and your goal is to restore the image. Even though we have not covered restoration, we have covered all the basic tools from previous tutorials to help you complete this challenge.
Remember, these challenges are not works of art and they are created only to help you use the information you have learned in prior courses.
If you are stumped, scroll down to the Challenge Area, Hints, or Answer section. You will first find some hints to help you complete certain areas of the project. If you still can’t figure out how to restore certain areas of the image, feel free to watch the answer video (either watch it online or download the file).
Challenge Completion Time:
Successfully completing this challenge will take 10 minutes or 15 minutes if you want to take the time and be careful. To make it look perfect it could take up to an hour.
Challenge Details:
| 1). You will need to download the supporting file which is a picture of the damaged photo. Scroll to the bottom Left click the download supporting files image. |
That is all the information you need to complete for this challenge. There are a few ways to restore this image. Remember it does NOT have to look exactly like our finished image. As long as you understand and can duplicate the basics, then you can consider this a success. As you can see we modified this image very quickly and there are a lot of corrections (lip, background blending, few dots, etc.) still need to be done.
Ok, here is the final image.
HINTS/ANSWERS ALERT
Please do NOT proceed with this document, unless you would like to find out the answer. We have broken this section up into 3 different areas (Challenge Areas, Hints/Answers, Answer Video).
Challenge Area:
| 1). Start with the easy areas (cracks). We discussed certain tools that will heal these certain areas quickly. | |
| 2). Notice the blank line that goes from left to right on the top? Think about how you could fill this area in. | |
| 3). You will need to mix and match tools to get certain effects right. Usually you will need to fill an area first and then try to blend it. | |
| 4). Did you read the last 2 tutorials? Your answers can be found there. | |
| 5). Work in a zoomed area and after a minute, zoom out and see how it looks. Remember, CTRL-“+” or CTRL-“-“ to zoom in and out. |
Hints/Answers:
Ok, we guess the challenge area above did not help you, so let’s show you some important areas of the challenge.
| 1). The white line at the top can be solved by using the Clone Stamp tool to fill this area (then you will need to blend it). Refer to the Cloning the Red Eye tutorial for more information. | |
| 2). The cracks in the image that were not close to other separate cracks, we used the Spot Healing Brush tool. Please refer to the Heal Problems with the Patch Tool tutorial for more information. | |
| 3). We were very careful around the left shoulder were the crack was and we set the starting clone point right below the crack and cloned upwards. We used the tool in the Cloning the Red Eye tutorial to fix this area. | |
| 4). Around the cheek area, we used the Patch Tool to resolve some shading problems. Check out the Heal Problems with the Patch Tool tutorial for more information. | |
| 5). Finally, we used the Heal Brush to blend areas into the image. Review the Heal Problems with the Patch Tool tutorial for more information. |
Answer Video:
Ok, the challenge area and the hints did not help. That is ok, because we created the answer video below for you.

Click Picture To Download Video File To View Offline
Download Total Video Player, iTinySoft
Click Picture To Download Supporting Files
(Brushes, Textures, Fonts, Images, Actions, .PSD, Etc.)
Download ZipGenius Standard Edition 6.0.3.1150, Dicono di ZipGenius


No comments:
Post a Comment