You have seen it in the movies or on television were they take a black and white photo and add color. Within Photoshop colorizing is very easy and can be done quickly. Throughout this tutorial we will give you tips and tricks on how to pick the correct colors. When we get to the skin (skin is harder to colorize) section, we will show you a very interesting technique that will allow you to get the skin tone correct. Finally, we will wrap up this tutorial (just like all the other tutorials) with a 10 quiz.
Currently we are using Windows Vista Home Premium 64 Bit and the Photoshop CS4 Extended 64 Bit version.
Knowledge You Need to Know:
If you are unfamiliar with certain areas that are not covered in this tutorial, feel free check out the other tutorials on our website. We have many different types of tutorials that can be downloaded (Video, PDF) or viewed online that will train you for free! Once you have the knowledge, feel free to come back and go through this tutorial again.
Preparing For This Tutorial:
You will be using a picture of Amelia Earhart taken by Time Magazine. If you do not have this image, please scroll down to the image of “Click Picture To Download Supporting Files” and download the image. Please open the image PE-AH in the Photoshop Program.
Techniques:
There are many different techniques to take a black and white image and add color to it in Photoshop. The technique that we will be showing you is easy and works very well, plus it is quick! For the skin area (toughest area to colorize), we will show you an additional step to make the skin look very good. We also show you if you want to keep an area white, how to brighten that color.
Research:
Colorizing in Photoshop is very easy, but getting the correct color is the tough part.
Even though this is not required, we highly recommend that you do some research before you colorize. What kind of research? If you want to match the colors correctly, you should begin with looking at colored photos of that era. If you can, find a colored photo of the exact object or person, etc. If you can’t find a photo of the specific object or person, then try to find other images of that era that match the clothing, hair color, objects, etc. Remember, you are not concerned about the texture of the object and you should only be looking at the color!
It is very easy if you can find the exact same object or person in color, but don’t hold your breath that you will be able to find a colored version on the Internet. Before we begin, we usually create 1 image with all the different examples that we will use as a template. Let’s take this image of Amelia Earhart. If you can’t find a colored image of Amelia Earhart and the clothing color, then begin searching for that era of clothing. Once you find good images of the jacket, pants, hair color, skin tone, etc. you are ready to begin colorizing. Keep these images open in Photoshop when you are coloring. You will use this as a guide to get the correct colors.
The Goal:
Please note that this technique falls under the beginner and intermediate category for Photoshop. If you are unfamiliar with Layer Mask, Free Transform Tool, Dodge Tool, Blending Modes, Opacity and common Layer palette areas, we recommend that you review those tutorials before proceeding.
The goal of this document is to show you one way to colorize a black and white image. Throughout the course we will show you modifications to that one technique which will help you solve common colorizing issues. We will not be colorizing the background of the image. Our goal for this tutorial only, is to make this image look good, but not perfect. If we wanted this to be perfect, we would spend a lot more time researching, adjusting the colors, Layer Masking, etc.
Colorize:
***After publishing the video, we realized we missed this step to confirm the image is in the RGB mode. Please read this paragraph before viewing the video. We are sorry for any confusion this may have caused you!
Once the black and white image is opened, you need to make sure that it is set to color. Left click the “Image” menu and move the mouse pointer to the “Mode”. From the sub-menu Left click the “RGB Color” command and make sure the 8 Bits/Channel has a check next to it.

We will start with colorizing her pants. Create a new Layer (Learning Layers With Ease or More Layers course) by Left clicking the “Layer” menu and moving the mouse pointer to “New”. From the sub-menu Left click the “Layer…” command.

You will than see a dialog box. Change the name to the area that you will be colorizing. In this example, we called it “Pants” and then we Left clicked the “OK” button. Photoshop Tip – You can also set the “Mode” to Color, but if you are like us, you will remember after you Left click “OK”.

Here is the real trick to colorizing! On the “Pants” layer, change the blending mode to “Color”.

When researching, we found in that era, the flight pants were tan colored. Change the Foreground color to: # d2b99b. Now us the Paint brush (Colors And Painting Tools tutorial) and paint over the pants. Do not worry if you paint more than just the pants. We will correct that soon! As you can see we got a little on her fingers and outside the pants.

Photoshop Tip – Want to make the color lighter? Just reduce the opacity in the Layers palette. Want to make the color darker or tweak it without re-painting a new color? Just make a Brightness/Contrast adjustment (Fixing Exposure And Brightness tutorial) and you can correct it without adjusting the color. Of course, all else fails, feel free to change the color and paint over that specific area again.
Time to clean up the areas that you painted incorrectly. Create a Layer Mask (Masking And Transform Information or More Masks Please tutorials) on the “Pants” layer and hide the extra areas.
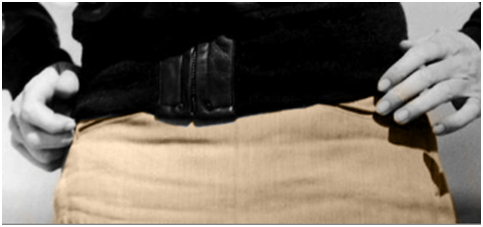
Now that you know the basics, we can repeat the steps and colorize the jacket. Start off and create a New Layer and call it “Jacket”. Change the Mode to “Color”. When researching, we noticed Amelia Earhart in a brownish jacket. Change the Foreground color to: #883b17 and paint over the jacket.

We realized that the orange was to strong, so we lowered the Opacity in the Layers Palette to 60%. Photoshop Tip – Reminder, you can change the color by changing the opacity!
Then we created a Layer Mask and removed the extra areas that were not related to the jacket. You will notice we did not color the shirt area where it zips up at the top jacket, because that was not part of the jacket.

Now we are onto her shirt that is shown below the scarf, but above the zipper. Create a New Layer called “Shirt”. Now move this Layer in the Layers Palette right above the “Amelia Earhart” Layer. Why did we want you to move it? Because we wanted to show you a trick that can be useful when colorizing an image. Because it is sitting lower in the Layers palette, you can’t cause too much trouble with the jacket. Change the Mode to “Color” and set the Foreground color to: #040119 and begin to use the Paintbrush.

Create a Layer Mask on the “Shirt” Layer and remove the extra areas of blue. Your end result should look like this.
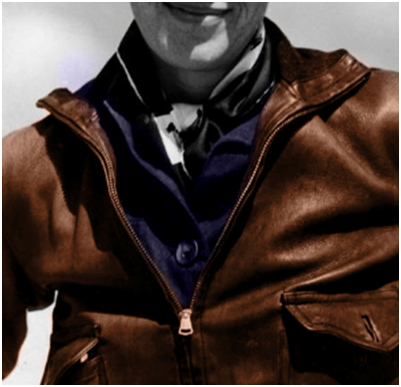
Now onto the scarf. When looking at this we felt it could have been a black and white scarf (maybe it was red), but we wanted to show you another technique, so we will leave it as a black and white scarf. One area that we felt could be enhanced is the white portion of the scarf could be brighter.
Change your layer in the Layers palette to “Ameila Hart”. Now make a selection around the top right hand corner of the white scarf. We are making a selection first; because we do NOT want to accidently brighten other areas of the picture.

Now change the tool to the Dodge tool (Dodge, Burn, And Sponge Tools tutorial) and change the Range to Midtones and Exposure to 100%. Now go over the white area once to lighten that area up. Our image now looks like this. Yes, it is a small change, but it looks better now. Photoshop Tip – If you want to really brighten it up, then change the Range to “Highlights”. 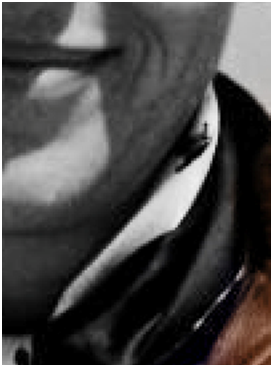
Repeat the whitening step and brighten up the other white areas (2 more areas) of the scarf. When we were done, we noticed that we needed to whiten it up a bit more, so we went and changed it to “Highlights” and made the exposure 16%. When working on another photo, you may need to adjust the exposure to something different.
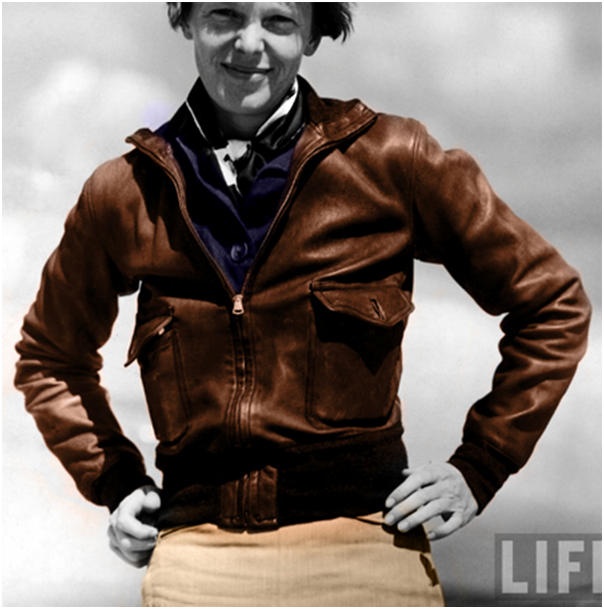
We have now colored most of the easy areas of this black and white photo, so let’s now get into some tougher areas. Most of the time skin and hair are the toughest to colorize because the shades of colors will change. Skin is usually the toughest, so let’s start with the hair.
The following technique involves, you finding a similar color object and pasting it as the “Color” mode layer. Your goal is to find a matching color of hair on another object. For her hair, we are looking for brownish and a little golden color. You are looking to match the color, not the texture of the hair! Remember you are not limited to people. Just to show you that any hair will work, we will be using this golden retriever’s hair.

Within this PSD file, you will find a hidden layer called “Example Hair”. Turn this layer on and make a selection around the color you need. The goal is to find a patch of hair that is big enough to cover the whole hair on the person or object. If you can’t find a large enough area, don’t worry, we will show you how you can correct that. Here is our selection.

Use CTRL-“X” to Cut and CTRL-“V” to Paste. Use the Move tool to move the hair over the top of Amelia Earhart hair. Rename the Layer “Hair”. Now hide the “Example Hair” layer. You will notice our cutout, was not big enough to cover the hair on the bottom right hand side of her hair. We made the cutout smaller than it was needed to show you how you can solve this common problem.
There are a few ways to solve this problem. 1). Use the Free Transform tool and Scale(you can also use the Distort and Skew, etc.) the dog hair to cover the area, 2). Make a bigger selection for the dog’s hair, or 3). Locate another picture that is larger in size. We could easily cut a new section from this dog, but we would rather you to begin to use the tools and techniques from previous beginner Photoshop tutorials. For this tutorial, please use the Free Transform tool and Scale or Skew this image. Please review the Transforming Objects or Transforming The Warp Tool tutorials for more information. Your image should now look like this.

Change the Layer to the “Color” mode and use a Layer Mask to remove the extra color that is not on the hair. Change the opacity in the layer palette to 60%. In a future tutorial (when we get to more advanced tutorials), we will show a great method on selecting hair. For now, just take your time and do your best.
Usually you will not be working with such uneven hair, but hey it is the picture that we chosen for this tutorial (sorry). The hair is the area as you can see below, we could have spent more time to make it look better. Remember this tutorial is to show you how to colorize and how to solve different coloring problems, not to show you advanced techniques to select uneven hair.

Let’s move to the hands, which will be much easier than the hair. Let’s work on the right hand first. Turn on the layer in the Layers palette called “Skin Example”. Cutout a portion of the hand, and Paste it to a new layer. Move the layer to above “Amelia Earhart” and change the blending mode to “Color”. Rename the layer to “Right Hand”. Use the Move tool to move the pasted image over the right hand. Please hide the “Skin Example” layer.
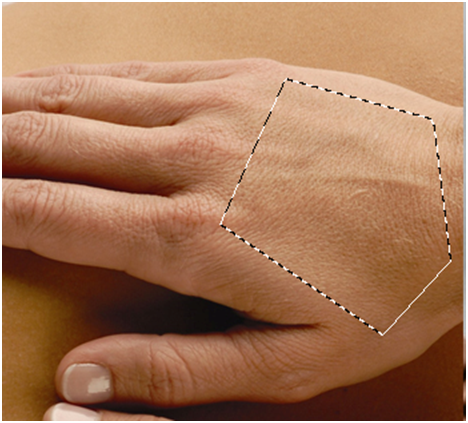
Now use the Layer Mask and remove the extra areas that are not the hand. Photoshop Tip – If you wanted to make the hand look perfect, you would take a lighter color and paint over the fingernails. Just find a color that is a little bit darker and that should solve the problem.

Now repeat the above process and finish the Left hand. Rename the layer to “Left Hand” in the Layers palette. After masking it, you are left with the following image.

Now let’s move onto the face area. Unhide the “Skin Example” layer again and Copy a portion of the skin and Paste it to a new layer. Hide the “Skin Example” layer. Rename the layer to “Face” and move the layer right above the “Amelia Earhart” layer. Use the Move tool and move the skin over the face. **You may need to use the Free Transform tool to either Scale or Skew to make the skin fit the face.
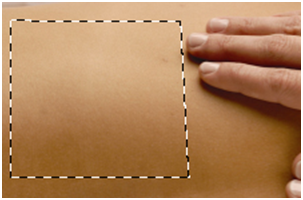
Change the blending Mode to “Color” and once again use the Layer Mask to remove any extra areas that are not needed. **Remove the skin tone from the lips area. We will be fixing that next. Photoshop Tip – If the eyes were more open and if she had thicker eyebrows, you would want to normally remove the skin tone from that area also and fix those areas on a different layer.

Create a new layer right above the “Amelia Earhart” layer and change the blending mode to “Color”. Now change the color to: #fb888d. Use the paintbrush and paint her lips area. Reduce the opacity in the layers palette to 60% (to make it look less like lipstick, feel free to reduce the opacity even lower). Finally, use the Layer Mask to clean up the edging of the lip area.
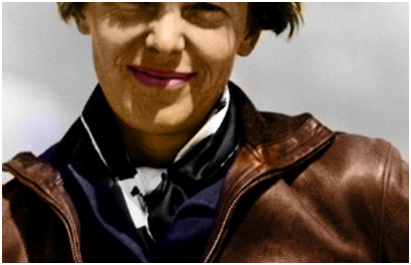
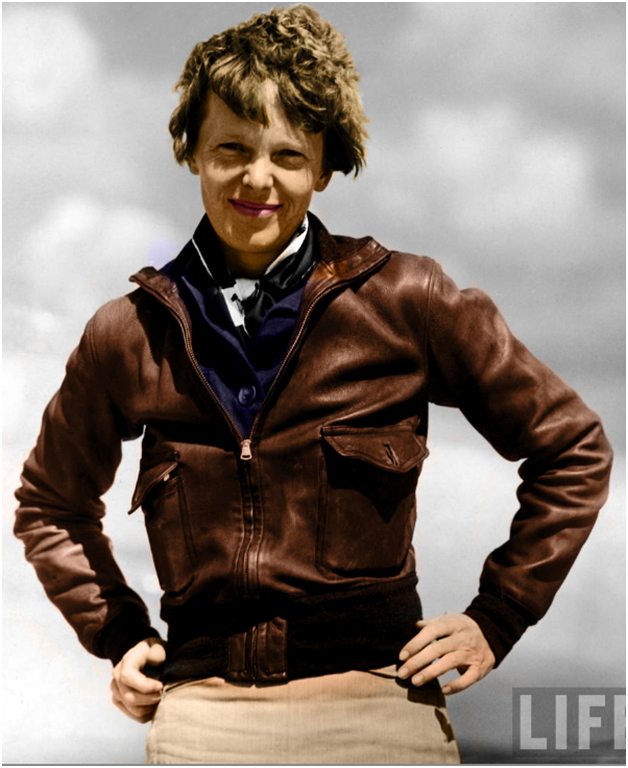
For the background, we would normally, just add a new background, instead of trying to colorize the clouds, sky, etc. For this tutorial, this is where we are going to end. Our goal of colorizing Amelia Earhart is complete. Here is what we started with.
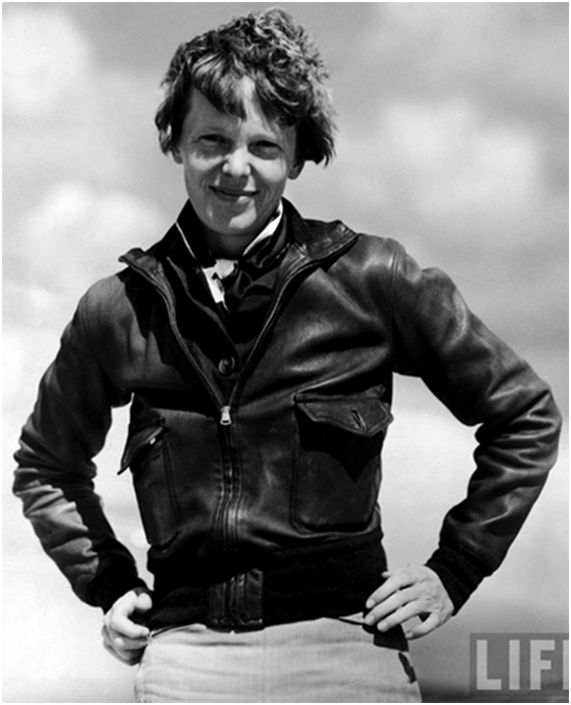
Here is what we ended with.
Conclusion:
As you can see, colorizing is easy if you know what color to pick. It takes time, but it is not a complex process. Throughout this tutorial, we showed you many different variations of the one technique. We showed you that you can change the color by using the Opacity or change a white color to be brighter with the Dodge tool. We even showed you a good way to get good skin color and hair color. We even explained about the finer details and if you needed to darken a color that you could make a Brightness/Contrast adjustment.
We explained that you should do research before beginning to colorize an image. By separating everything into different layers it allows you to make final adjustments to the image all the way to the point of saving it as a compressed file such as a JPG. We also keep our Layer Masks unapplied all the way to the end of the project. The reason is that you can make your final tweaks later.
We are pleased with the results of the jacket, skin tone, shirt, scarf, but because we did not want to get too advanced, we stuck with the Layer Mask to remove unwanted areas. This can be a bit frustrating when you are masking hair. There are much better ways to accomplish the coloring of the hair, but that will need to be in a more advanced tutorial.
There are many different techniques to colorize an image. This does not mean our technique is the fastest or easiest way. We like this technique, because it is fast and always gives a good result and allows easy changes, even after you have colorized the image. So how long does an average photo take to colorize? It depends on how many objects or areas you need to colorize. If there is no skin or hair and you have 4 different sections you need to colorize, than you can usually get most of it done in 10 minutes (sometimes as quick as 5 minutes) and to make it look perfect, it may take 20 minutes.
We hope you enjoyed this tutorial. We spent a very long time creating this tutorial. Our goal was to try to come up with a course that would not only show you how to colorize, but show you different ways to manipulate the colors. It is important to understand these different ways because you will need to use some of those techniques in most of the colorization images.

1). To colorize a black and white image, what color “Mode” (from the image menu) should you change it to?
| A). Lab Color. | |
| B). CMYK Color. | |
| C). Color. | |
| D). RGB Color. |
2). What do you change in Photoshop to tell it that you want to colorize that layer?
| A). Change the blending mode in the Layers palette to “Colorize”.. | |
| B). Change the blending mode in the Layers palette to “Colored”. | |
| C). Change the blending mode in the Layers palette to “Color”. | |
| D). Change the blending mode in the Layers palette to “Color Correction”. |
3). What is one way to tweak or adjust the color of the Layer?
| A). In the Layers palette, Left click the colored box (to the right of the image) and change the color. | |
| B). Change the Opacity in the Layers palette. | |
| C). From the “Edit” menu Left click “Matching Color” to adjust your color. | |
| D). The easiest way is to correct the color by using the “Eye Dropper” tool and you will notice it will change the whole color of the layer. |
4). What did we highly recommend to do before you begin colorizing an image?
| A). Always make 3 extra backup copies of the black and white layer. You will need these additional layers when colorizing an image. | |
| B). Always begin with the background of the image removed. This will allow you to colorize correctly. | |
| C). Determine the amount of channel bits that are in the image and times it by 8. | |
| D). Try to find other images of that era that is already in color. |
5). To brighten a white color when colorizing, what is one tool you could use?
| A). Dodge. | |
| B). Sponge. | |
| C). Burn. | |
| D). Lighten. |
6). To remove the extra coloring that is not needed for that layer, what is an easy technique that you could use?
| A). The easiest way is to make a selection around the outside of that area and then cut the area and paste it into a new file. | |
| B). The easiest way is use the “Auto” option to remove the excess coloring. | |
| C). The easiest way is to create a Layer Mask and hide the color. | |
| D). The easiest way is to blur the edging so that you do not see the coloring. |
7). To match hair or skin color we recommended what?
| A). Find another picture and look at the color and then try to find the exact color. | |
| B). Create a “Color Matching” Layer, which will determine the correct shade of the hair or skin. | |
| C). The easiest way is to keep changing the Foreground color. | |
| D). Just paste another image that is similar to the color that you are looking for and then change the mode for the layer. |
8). When we used the tool to brighten the white area up, why did we make a selection around the white area first?
| A). So we would not accidently brighten areas outside the white portion of the scarf. | |
| B). We did this so we could copy it to a new layer. | |
| C). So we would not need to create a “”Channel” after we brightened the image. | |
| D). We did this so we could zoom farther into the picture without distorting the image. |
9). After you colorize the face area, what are the 3 common areas that you would remove the coloring from and manually adjust the color?
| A). Lips, Cheeks, Nose. | |
| B). Eyes, Nose, Eyebrows. | |
| C). Ears, Lips, Eyes. | |
| D). Eyes, Lips, Eyebrows. |
10). As a general rule, you should?
| A). Apply all Layer Masks as you finish that area (jacket, shirt, skin, etc.). | |
| B). Colorize multiple areas (shirt, jacket, etc.), using 1 layer. | |
| C). Do not apply the Layer Masks until you are finished with the project. | |
| D). Duplicate the background layer at least 3 times for backup purposes. |
Answers: 1). D, 2). C, 3). B, 4). D, 5). A, 6). C, 7). D, 8). A, 9). D, 10). C.
Scoring:
0 - 5 = Please review the video tutorial and re-read this document either offline (PDF) or online.
6 – 8 = We would recommend that you print this document off and read it at a later time.
9 – 10 = Congratulations you have passed the quiz. Go ahead and view another tutorial on our site.
We hope you enjoyed this detailed tutorial. Please visit us at: http://www.Photoshopeducation.blogspot.com to expand your knowledge within Adobe Photoshop.
***After publishing the video, we realized we missed the 1st step in this written documentation to confirm the image is in the RGB mode. Please read this paragraph before viewing the video. We are sorry for any confusion this may have caused you!
***After publishing the video, we realized we missed the 1st step in this written documentation to confirm the image is in the RGB mode. Please read this paragraph before viewing the video. We are sorry for any confusion this may have caused you!

Click Picture To Download Video File To View Offline
Download Total Video Player, iTinySoft

Click Picture To Download PDF Tutorial
Download Adobe Reader, Adobe Corporation
Click Picture To Download Supporting Files
(Brushes, Textures, Fonts, Images, Actions, .PSD, Etc.)
Download ZipGenius Standard Edition 6.0.3.1150, Dicono di ZipGenius


Such posts intrigue me very much.
ReplyDeleteCassandra
Very interesting information here I can find hot girls sex
ReplyDeletePhotoshop Detailed Tutorial Training Site >>>>> Download Now
ReplyDelete>>>>> Download Full
Photoshop Detailed Tutorial Training Site >>>>> Download LINK
>>>>> Download Now
Photoshop Detailed Tutorial Training Site >>>>> Download Full
>>>>> Download LINK 7T