| Page: | 1, | 2 | ||||
Special Tutorial:
Tutorial Name: Beginner Guide to Spotting a Fake
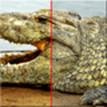
Summary: Nope were not talking about spotting fake diamonds or watches or purses, but we are talking about spotting a modified image. Let’s us make it very clear that we are NOT expert Photoshop users and we are not trying to tell you every possible way to find problems with modified pictures. We have worked over 7 years rating and judging Photoshop contests and we see common problems in beginner’s entries. Also, the images below might not be the best examples, but at this stage we just want you to get a feel for problems to look out for.
The steps below will walk you through the basics of Photoshop. If you follow the courses in order, you will learn Photoshop quickly! To jump directly to the tutorial, Left click the hyperlink in the tutorial name or the Left click the image.
Course 1:
Tutorial Name: The Work Area
Summary: The following tutorial will walk you through from launching the program to the work area of Photoshop, including palette information and other important areas of this program. By the time you are done with this exercise, you will understand the layout and some important terms used in this graphics program. When you are finished with the tutorial, please complete the quiz.
Course 2:
Tutorial Name: Working With Image Files
Summary: The following tutorial will walk you through creating a new image file to opening a picture. We will also show you how to save an image and some important keyboard shortcuts. Along the way we will show you many different tips and tricks that can be used in Photoshop and image files such as how to open multiple files at once.
Course 3:
Tutorial Name: Ready, Set, Save
Summary: In this tutorial will get the file ready by changing and setting the file information and we will be showing you different ways on how to compress the image to make it a smaller file size so it can be viewed on the web or shared with friends. The beauty of compressing an image in Photoshop is it reduces the file size with very little quality loss to the picture. If you are going to share images, then this is a must tutorial to read!
Course 4:
Tutorial Name: Colors And Painting Tools
Summary: In this tutorial we will show you how to use the different features of the Paint Brush and the Pencil tool. By the time you are done with this tutorial you will also be able to select a color to use in your image from many different ways (picking the color from an existing image, using numeric values to find your color, etc.). While we proceed through this tutorial we will show you tips and tricks such as how to undo your work if you make a mistake (yes, we all make mistakes).
Course 5:
Tutorial Name: Drawing Tools
Summary: In this tutorial we will go over the drawing tools. We will be discussing the Rectangle Tool, Rounded Rectangle Tool, Ellipse Tool, Polygon Tool, Line Tool, and the Custom Shape Tool. The beauty of the drawing tools in the Photoshop program is once you learn one of the tools the rest of the tools will be very easy to understand. Along the way we give some tips and tricks with these tools.
Course 6:
Tutorial Name: Transforming Objects
Summary: In this tutorial we will go over transforming objects. Once you have created your shapes using the Drawing Tool it is time to manipulate them. In this tutorial you will learn how to change them using the Transform Path settings. These transformations are not limited to just the basic shapes and can be used to manipulate lines, text and other objects. Along the way we will show you important tips and tricks for the Transform Path.
Course 7:
Tutorial Name: Text Features
Summary: In this tutorial we are going to train you not only how to add vertical and horizontal text with the type tools, but how to warp the text. We will be discussing spell checking and other features such as typing on a path using the Pen tool. By the time you are done with this training, you will understand these areas, plus more. Text is fun, so let’s have fun with this tutorial and learn the basics of the Type tool. Sit back and enjoy this tutorial.
Course 8:
Tutorial Name: Custom Brushes
Summary: Today we are going to talk about creating custom brushes. The easiest way to create a custom brush is from an image. Once created, it will always be in your brush presets. We will show you how to use this custom brush and how and even how to delete a brush. Along the way we will even train you on the basics of the Lasso tool and we will get your feet wet with Layers. Have fun and enjoy this tutorial about custom brushes.
Course 9:
Tutorial Name: Zoom And Panning
Summary: In this tutorial we are going to show you many different ways to zoom in and out of an image. We will show you everything from the magnifying glass to the navigator palette. Along the way we will even give you little tips and tricks such as the keyboard shortcuts to zoom in and out. As you’re working with your image, you may need to zoom in to make minute changes, zoom out to see how your image looks overall, and otherwise move around to ensure that you’re working with just the image area you need. Photoshop offers a number of techniques you can use to change your view of the image.
Course 10:
Tutorial Name: Selecting Image Content
Summary: In this tutorial we will show you the basics of selecting image content. Photoshop offers a number of selection tools to copy or move a portion of the image. With good selections, you will be on your way to editing photos quickly. We will be discussing the Rectangular, Elliptical, Single Column/Row Marquee Tool, Lasso, Polygonal Lasso and the Magnetic Lasso tool. While we walk you through the common steps to select an image, we will show you some important tips and tricks such as how to add or subtract from your selection.
Course 11:
Tutorial Name: Magical Colors And Selections
Summary: What is magic about colors is that you can select colors by using the Magic Wand or even by selecting a Color Range. We will also be discussing how to use the Quick Selection Tool. Along the way we will be showing you tips and tricks on how to expand or even subtract from a selection. We will walk you through what the inverse command is and how you can even reselect your last selection. In this Photoshop tutorial, we will also be discussing how to save/load selections. Throughout this course, we will also be passing along important keyboard shortcuts.
Course 12:
Tutorial Name: Grids, Guides, And Rulers
Summary: Photoshop provides more precision editing tools than perhaps any other graphics program. Now that you know how to select and move image content (please refer to the Selection tutorials), you may want to try out these tools. These features of Photoshop will help you align your selections perfectly. Throughout this course, we will train you on Grids, Guides, and Rulers. While going through this tutorial we will show you some tips and tricks with these features, such as how to lock your guide or how to use the snap to feature.
Course 13:
Tutorial Name: Patterns
Photoshop provides you with patterns which are usually used to tile a portion of your image you are editing. We will show you how to use a pattern and if none of the patterns provided with Photoshop suits your needs, you can create your own using one of two methods. We will be showing you how to sample a pattern and how to use the Pattern Maker filter (if you are running Photoshop CS4, you will need to download this filter). We will also, show you what is a Patterns Overlay option within the blending options of layers and how to duplicate a layer.
Course 14:
Tutorial Name: Learning Layers With Ease
One of the key components of Photoshop is layers. Layers allow you to stack images, shapes, text, etc. If you take 2 pieces of paper and you put one on top of the other and partially cover the bottom piece of paper, that is similar to a layer in Photoshop. We will show you not only how to create layers, but also how to rename the layer and even how to change the layer order. As we proceed with this course, we will also explaining how to delete a layer, hide layers or even change the opacity of a layer. Before we are finished, we will also explain terminology such as what happens when you “Rasterize Layer”.
Course 15:
Tutorial Name: More Layers
In this tutorial we will walk you through even more of the Layer options. In the first tutorial called Learning Layers With Ease we showed you the basics of Layers and now it is time to expand your knowledge by explaining how to create a new blank layer (2 different methods) to attaching a color identifier to a layer. We will even explain how to copy a layer from one image and add it to another image. Finally we will discuss how to group layers and what is the “Flatten Image” option.
Course 16:
Tutorial Name: Eraser Tools
We will soon be showing you what a layer mask is, but before we get to that we want to show you the Eraser tools. Eraser tools allow you remove portions of the image such as an eraser on a pencil. The reasons why we are showing you this first is the eraser tools are permanent changes were masks are temporary removals. In this tutorial we will be discussing the eraser tool, background eraser tool, magic eraser tool. We left one of the most dangerous tools in Photoshop at the end of the tutorial (Magic Eraser Tool). Along the way you will learn tips and tricks on how to use these eraser tools more efficiently.
Course 17:
Tutorial Name: Canvas Size, Cropping, Image Size
With this tutorial you are one step closer on learning how to mask areas of an image. We wanted you to learn how to crop an image or even how to resize the picture. We will walk you through on how to change the canvas size. This is a very nice feature and if you want to expand onto the canvas size (top, bottom, left, right or even the corners) without causing problems with your original image use this tool. Please take a moment and review this quick tutorial because we will be using the features in the next tutorial which talks about masking objects in Photoshop.
Course 18:
Tutorial Name: Masking And Transform Information
Have you ever tapped off portions of a room before you painted it? Well then you have already masked before. In Photoshop you paint on a mask and in this tutorial we will be showing you how to do a Quick Mask to select an area and what a Layer mask is. We stated back in the Eraser tool tutorial that once you learn how to mask an image; you will never want to go back to the eraser tool. We will also be showing that the Transform Path which we explained in a previous tutorial is exactly the same as the Transform option.
Course 19:
Tutorial Name: More Masks Please
We have now gone over the basics of masking, let’s take this tutorial and add on to your knowledge and learn more basic functions of Layer Masks. In this tutorial we will be showing you another way to copy from one image to another image. We will show you a quicker way to create a Layer Mask and how to disable/enable the Layer Mask. In the past, we have explained how to crop a full image and in today’s course we will show you how you can crop a layer. Finally the reveal all versus hide all will be explained.
Course 20:
Tutorial Name: Selection With The Pen Tool
You are about to tackle one of the tougher tools within Photoshop, the Pen Tool. Because we are a beginner/intermediate site, today we are just going to go over the basics of how to use the Pen Tool to make a selection. Back in the Text Features tutorial, we showed you how to type on a Path and you created the Path using the Pen Tool. Today we take you 1 step closer to learning this feared tool.
Course 21:
Tutorial Name: Smudge, Sharpen, Blur Tools
In this course, we will be discussing how to use the Sharpen, Smudge, and Blur Tools within the Photoshop program. You will find these tools to be very useful for making small corrections to an image. Sometimes blurring a part of an image can help you camouflage an imperfection. The Sharpen tool is best to sharpen edges of an object or a subject. Finally, smudging allows you to drag a color from one area into another. Along the way we will show tips and tricks with these important tools within the program.
Course 22:
Tutorial Name: Gradient And Paint Bucket Tools
This tutorial not only shows you the features of the Paint Bucket tool within the Photoshop program, but it also shows you how to use the Gradient tool. We will even show you how to create custom Gradients! You may be thinking that you do not need to know how to use these tools, but you will be using these tools once we get into shadows. While proceeding through this extensive screenshot tutorial, we will also give you tips and tricks.
Course 23:
Tutorial Name: More Gradients Please
We already covered how to create Gradients in the previous tutorial (Gradient And Paint Bucket Tools) and now it is time to add onto your knowledge and learn additional features of this tool. In this tutorial, we will be discussing how to add a Gradient to the presets and how to load and save Gradients. Also included in this training will be how to rename or delete your Gradients. Don’t worry if you run into problems, you can always reset your Gradient presets back to the Photoshop defaults.
Course 24:
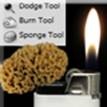
Tutorial Name: Dodge, Burn, And Sponge Tools
The Dodge, Burn, and Sponge tools in Photoshop help you mimic a photographer’s tricks in correcting lighting in an image. We will be showing you the Dodge tool which will help you lighten an area and even the Burn tool which will darken an area. Finally we will show you the Sponge tool which can desaturate or saturate a color. These tools are a necessity for any amateur or professional photographer that is looking to enhance specific areas of a photo.
Course 25:
Tutorial Name: Heal Problems with the Patch Tool
Summary: In this tutorial, we will be discussing how to use the Spot Healing Brush, Healing Brush, and the Patch tool. Even though these 3 tools are commonly thought of removing wrinkles, age spots, acne, scars, or even moles, these tools can be used for any image to help it blend better. We will show you that the Spot Healing Brush is very easy to use, but the Healing Brush allows you more flexibility when fixing images. We hope you enjoy this tutorial and the many other tutorials on our site that help you learn Photoshop quicker and easier.
Course 26:
Tutorial Name: Cloning the Red Eye
Summary: In this tutorial we will be showing you how to use the Red Eye tool, Clone and Pattern Stamp tools. You will find the Red Eye tool is very easy to use and the Clone Stamp tool to be very useful. We will also be discussing the Pattern Stamp tool which can be used to fill a portion of the image with a Pattern. Along the way we will be giving you tips and tricks such as the “Impressionist” option for the Pattern Stamp tool will give it an artistic effect (blurs certain areas). For fun, we will also be adding a 3rd eye to a woman.
Course 27:
Tutorial Name: All About The History Palette
Summary: So you learned History in school? Well that is not going to help you with the History palette options within the Photoshop program. We will soon be discussing the History Brush and the Art History Brush and we wanted you to get a great understanding of how to take snapshots, delete, add, etc. in the History palette. In this tutorial, we will even show you how to change the preferences so you can support more than 20 history steps. Along the way, we will show you tips and tricks within this palette.
Course 28:
Tutorial Name: Add Art To Your History Brush
Summary: It is time to put on your artistic hat and learn how to use the Art History Brush to make some very interesting styles that look similar to a painting effect. Both the Art/History Brush allow you to restore a portion of the image back to a previous snapshot of history. In this tutorial, we will also be showing you how to create a Radial Blur effect by using a Filter. Along the way we will also be giving you tips and tricks, such as how to add more detail when using the Art History Brush.
Course 29:
Tutorial Name: Slice The Crop Tool
Summary: In this tutorial, we will be showing you how to use the Crop Tool and the Slice Tool. Most projects you will end up using the Crop Tool which allows you to remove extra unwanted picture information. We will also be showing you how to use the Slice Tool. If you are going to be uploading images to a website and want to either slice it up into multiple pictures (it loads each image separately) or maybe you are interested in adding a hyperlink, well this is the tutorial for you. Along the way, we will even show you tips and tricks on how to distort the Crop Tool.
Course 30:
Tutorial Name: The Autos
Summary: Before we get into the manual corrections, we need to show you the different auto correction features in Photoshop. Auto Tone, Auto Contrast, and Auto Color are the areas we will be discussing in this tutorial. You will find most of the time, these 3 tools will improve your image, but most of the time if you manually adjust the settings you will get better results. If you are looking for a quick fix, these tools will do a good job (not a great job) at correcting lighting and enhancing colors. Along the way, we will show you how to even enhance a portion of the Photo!
Course 31:
Tutorial Name: Straight To Curves
Summary: With the Curves Adjustment you will begin learning how to manually adjust your images. In the previous tutorial we showed you how you can use the auto enhance features in Photoshop which does a good job. Once you learn how to use the Curves adjustment, you will see excellent results in enhancing your images. Throughout this course you will learn how to read the curve chart or even how to sample colors using the Eye Droppers. Finally, throughout this tutorial we will be giving you some tips and tricks about Curves!
Course 32:
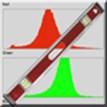
Tutorial Name: Levels And Histogram
Summary: In this tutorial we will be explaining what a Histogram is and how to use the Levels adjustment option. With Levels, you can adjust the highlights, midtones, and shadows of the image. By understanding how to read the Histogram, you will be able to make the correct adjustments to either all 3 primary colors (RGB) or to only the reds, greens or blues. Along the way we will be showing you some important tips and tricks on how to make your image look great.
Course 33:
Tutorial Name: Fixing Exposure And Brightness
Summary: In this course we will be going over the Brightness/Contrast adjustment and the Exposure adjustment in Photoshop. These are 2 additional tools in Photoshop that will allow you to enhance your images. We will also be explaining some basic terminology such as gamma correction or even what is it when someone says “that image looks overexposed”. Along the way we will give you additional tips and tricks on improving your photos.
Course 34:
Tutorial Name: Boosting And Enhancing Colors
Summary: In this tutorial you will learn how to boost the colors through the Vibrance adjustment and Color Balance. Within the Vibrance adjustment you can saturate/desaturate colors without causing problems to skin tones. With the Color Balance, it will allow you to change the colors of the shadows, midtones and the highlights. Between the 2 tools, you can boost and enhance colors of any image. Throughout the course, we will give you additional tips and tricks on how to enhance your images even further.
Course 35:
Tutorial Name: Hue And Saturation Adjustment
Summary: Today we are going to show you not only how to use the Hue and Saturation adjustment to enhance your colors, but we will be showing you how to replace/change specific colors. This tutorial will go over all the details such as what is hue, saturation or even the lightness options do in the dialog box. Along the way we will even show you some excellent tips and tricks such as how to only adjust a certain portion of the whole image.
Course 36:
Tutorial Name: Aging Photos, Black And White, Sepia
Summary: In this tutorial we show you why the Black and White adjustment is better than desaturation and we will take a colored photo and add a Sepia tone which will allow the image to look aged. We will even show you how to add some grain to the photo which will add to the realism of an aged photo. Throughout this course we will give you many tips and tricks on improving the black and white or sepia image. Of course, the video (online/offline), written, PDF files, supporting files and quiz are FREE!
Course 37:
Tutorial Name: Channel Mixing The Photo Filter
Summary: In this tutorial we will be showing you how to use the Photo Filter and the Channel Mixer. With the Photo Filter it will allow you to add color overlays to an image. The Channel Mixer will allow you adjust the reds, greens, or blues. Finally, you will learn how to use the Channel Mixer and make a black and white image. Throughout the course we will give you definitions to some common terms such as, what is a Channel in Photoshop.
Course 38:
Tutorial Name: Adjusting The Adjustment Layer
Summary: Adjustment Layers are created to allow you to make the correct adjustments (curves, levels, etc.) to an image without actually applying the changes permanently. Through this course we will show you how you add, delete, or change adjustment layers. We will also walk you through how you can use the layer mask with adjustment layers. Finally, we will give you important tips and tricks which will allow you to make your photos look like they were professionally taken.
Course 39:
Tutorial Name: Basics Of Sharpening
Summary: In this tutorial we will be discussing the first 4 sharpening techniques (sharpen, sharpen edges, sharpen more and unsharp mask) in Photoshop. We will show you the advantages and disadvantages of each technique. Each technique will be explained in detail on what it does and its limitations. Along the way, we will give you tips and tricks such as how to partially sharpen an image. Don’t worry if these 4 different techniques do not sharpen your image perfectly because we will be having more sharpening tutorials in the next few courses.
Course 40:
Tutorial Name: Smartly Sharpen Your Images
Summary: In this course we will show you how to use the Smart Sharpen filter. This technique of sharpening gives you more options than some of the other sharpening techniques. Some of the options are to correct Motion blur, Lens blur, and Gaussian blur. We will show you how to use the advanced options within the Smart Sharpen filter. These options will allow you to decrease sharpening for shadows or highlights only. Throughout this course, we will give you tips and tricks on how to sharpen your image to make it look perfect.
Course 41:
Tutorial Name: High Pass Sharpening
Summary: In this tutorial, we will be showing you the last sharpening technique and it is called the High Pass technique. High Pass filter is one of the obscure Photoshop filters that tries to determine the edges in an image. When you blend the High Pass layer with the original unsharpened image, you get a great looking image. Throughout this course we will show you different blend modes and give you tips and tricks to improving the image quality.
Course 42:
Tutorial Name: Sharpening Comparison
Summary: We just finished another tutorial on sharpening in Photoshop. The sharpening techniques that we discussed covers all of the common sharpening methods inside Photoshop. When we are finished with the beginner and intermediate courses, we will come back and give you the advanced (uncommon) techniques. We thought it would be useful for you to see a comparison of the different sharpening methods.
Course 43:
Tutorial Name: Layer Blending Mode Guide
Summary: Layer blending modes are a key part of the Photoshop program. When you have more than 1 layer, than you can blend the layers together. The blending modes are broken into 6 main areas. 1). Basic, 2). Darken, 3). Lighten, 4). Contrast, 5). Comparative, and 6). Composite. Instead of this being a tutorial, this is going to be more of a reference guide. Keep our website as a favorite and refer back to this document whenever you are trying to blend layers.
Course 44:
Tutorial Name: Extracting The Background
Summary: In this tutorial we will be showing you how to use the Extract Filter in Photoshop. There are many ways to remove the background from the image, but we find that the Extract Filter does a good to excellent job with extraction. We will be showing you how to highlight the edges of the object and to fill that specific area that you would like to protect from being extracted. Along the way, we will give you tips and tricks how to remove the background for tough foreground objects.
Course 45:
Tutorial Name: Transforming The Warp Tool
Summary: In the past tutorials, we showed you how to transform objects and how to use the basics of the Warp tool to distort text. In this tutorial, we will show you how to use the Free Transform tool and we will expand on your knowledge with the Warp tool. Along the way, we will show you how to warp an image around a coffee cup. We will also show you some tips and tricks to speed the process up on transforming your image.
Course 46:
Tutorial Name: The Cast Shadow
Summary: There are many different types of shadows, but the most common shadow is the cast shadow. It is a shadow that is created by something blocking the light source. In this tutorial, we will show you how to create cast shadows in Photoshop. If you are trying to merge more than 1 image together, you will usually need to fake the cast shadow. Along the way we will give you tips and tricks on how to determine what strength and size for the new shadow.
Course 47:
Tutorial Name: Colorize Black And White Image
Summary: You have seen it in the movies or on television were they take a black and white photo and add color. Within Photoshop colorizing is very easy and can be done quickly. Throughout this tutorial we will give you tips and tricks on how to pick the correct colors. When we get to the skin (skin is harder to colorize) section, we will show you a very interesting technique that will allow you to get the skin tone correct. Finally, we will wrap up this tutorial (just like all the other tutorials) with a 10 quiz.
Course 48:
Tutorial Name: Match Color With Ease
Summary: Have you ever looked at 2 different images and wanted to match the coloring from either the whole image or a specific part of the image? Photoshop offers an excellent adjustment called “Match Color”. With this adjustment it allows you to match from a source image and from a specific part of that image. Throughout this course we will give you tips and tricks on how to organize and tile the windows, plus how to swap the tabs of the windows. You can take a dull and boring picture and add vibrant colors from the source image.
Course 49:
Tutorial Name: Replacing Your Colors
Summary: Wouldn’t it be nice to be able to select a specific or a range of colors and replace it with another color? Well you can do that in the Photoshop “Replace Color” adjustment. We will show you how to replace a color for the whole image and even show you how to replace only a portion of the colors in a picture. Along the way, we will show you how you can save and load your settings!
Tutorial Name: Color Replacement Tool
Summary: Over the last few courses, we have shown you how to change the colors of a picture. Here is an excellent tool in Photoshop that will allow you to replace a color. Throughout this course we will show you how you can have Photoshop only change specific colors, which allow you to replace colors for a specific area. We will show you, what to do if you make an error with the Color Replacement tool. At the end of the course we will show you how you can change a specific area of image using text.
| Page: | 1, | 2 | ||||






![clip_image002[1] clip_image002[1]](https://blogger.googleusercontent.com/img/b/R29vZ2xl/AVvXsEjiZEuLa0eODPKP5ee2dlixlEZsvC3JPORaYUfX6dJ_Y1p3rBkQB8aZrDGMlPljWnq9C0PS4TgedmfvsgRbPTzXBSke5tM-ULv7igU6B_R-E3U7o7S9rY2CQ8Tv5cFdDOHJ7i56b-sEHJ0/?imgmax=800)






This is karthik. Thank u very much for these tutorials...These are very simple & detailed to understanding and very useful for all...
ReplyDeleteYour welcome. We created this site to help people and I am glad that all of our time spent creating videos, tutorials, pdfs, etc. for free is paying off.
ReplyDeleteHave to really thank you guys for these tutorials - I've been using Illustrator for several years but for some reason was always somewhat wary of using Photoshop. Your tutorials have completely changed that, their striaghtforwardness and easy to follow steps have enabled me to overcome my uneasy and I now find I can achieve a lot of visual effects much quicker and easier in Photoshop than Illustrator. Thanks again, I look forward to future tutorials to further my knowledge.
ReplyDeleteHey guys this is a superb site, just stumbled across it the other day. First class work guys. been trying to find a site where i can properly learn photoshop for ages.
ReplyDeleteToday, we split off this page to a second page. For more tutorials, please Left click on the next page button or Left click on the number 2 link.
ReplyDeleteJust wanted to thank you for these great tutorials! They are so easy to understand, and now I can finally learn my PS properly :D
ReplyDeleteThese are fantastic Tutorials thanks for the time and effort
ReplyDeleteI found this site by accident - I was looking for a tutorial on guides and rulers and this popped up. thanks very much, it fills in some gaps I have missed along the way on my journey to master Photoshop.
ReplyDeleteOh, these many tutorial guide in one blog itself....great help for readers too. I am gonna to search each tutorial at different sources...you saved my time too...http://photoshoptutorials.co.in
ReplyDeleteOh my!!! You are just too true to be good. How do you manage to write and research on such wonderful things? You have inspired me to work harder now. I shall try as much as possible to enjoy life to the fullest and be satiated with the wonderful things that are around me, which I have been unaware of until now.
ReplyDeleteclipping path
You have done such an amazing job on this series. I envy your sewing skills and your patience and your diligence. If anyone ever asks me how to sew, I'm sending them to your blog and this series. Congratulations on such an extensive, well thought out and clearly presented set of tutorials. clipping path services
ReplyDeleteSuch an amazing tutorial that is, thanks for this.
ReplyDeleteClipping Creations India | ecommerce image editing
Very nice collection... Thanks for share this awesome collection.
ReplyDeleteclipping path service in Usa | ghost mannequin service
Amazing website. Really informative. Thanks
ReplyDeleteCar Photo editing
Thanks for sharing Photoshop tutorial. Clipping Path
ReplyDeleteVery interesting insight about photoshop education. I believe in professionals so this is a very useful article for everyone. Thanks for sharing. Product photo editing
ReplyDelete